How to Turn Your Webnovel into a Webtoon Without an Artist
A step-by-step guide for web fiction authors who want to add comic visuals to their ongoing story without hiring or learning to draw.
The opportunity
Thousands of webnovel chapters are published every day. Adding even one comic image per chapter gives readers something to share, something to look forward to, and something that sets your story apart from plain text.
Why webnovel authors are a natural fit for AI comic conversion
Webnovel writers already produce long-form story content in text. The scenes are already broken into chapters. The characters already have names, appearances, and recurring traits. That is most of the work done.
What AI comic generation adds is the visual layer. Instead of paying an artist for each chapter illustration, or releasing only text forever, you can generate comic-style images from your own story segments at a fraction of the cost.
This is not about replacing hand-drawn webtoons. It is about giving self-published authors a way to add a visual experience without waiting for a contract, finding an artist, or spending months in production.
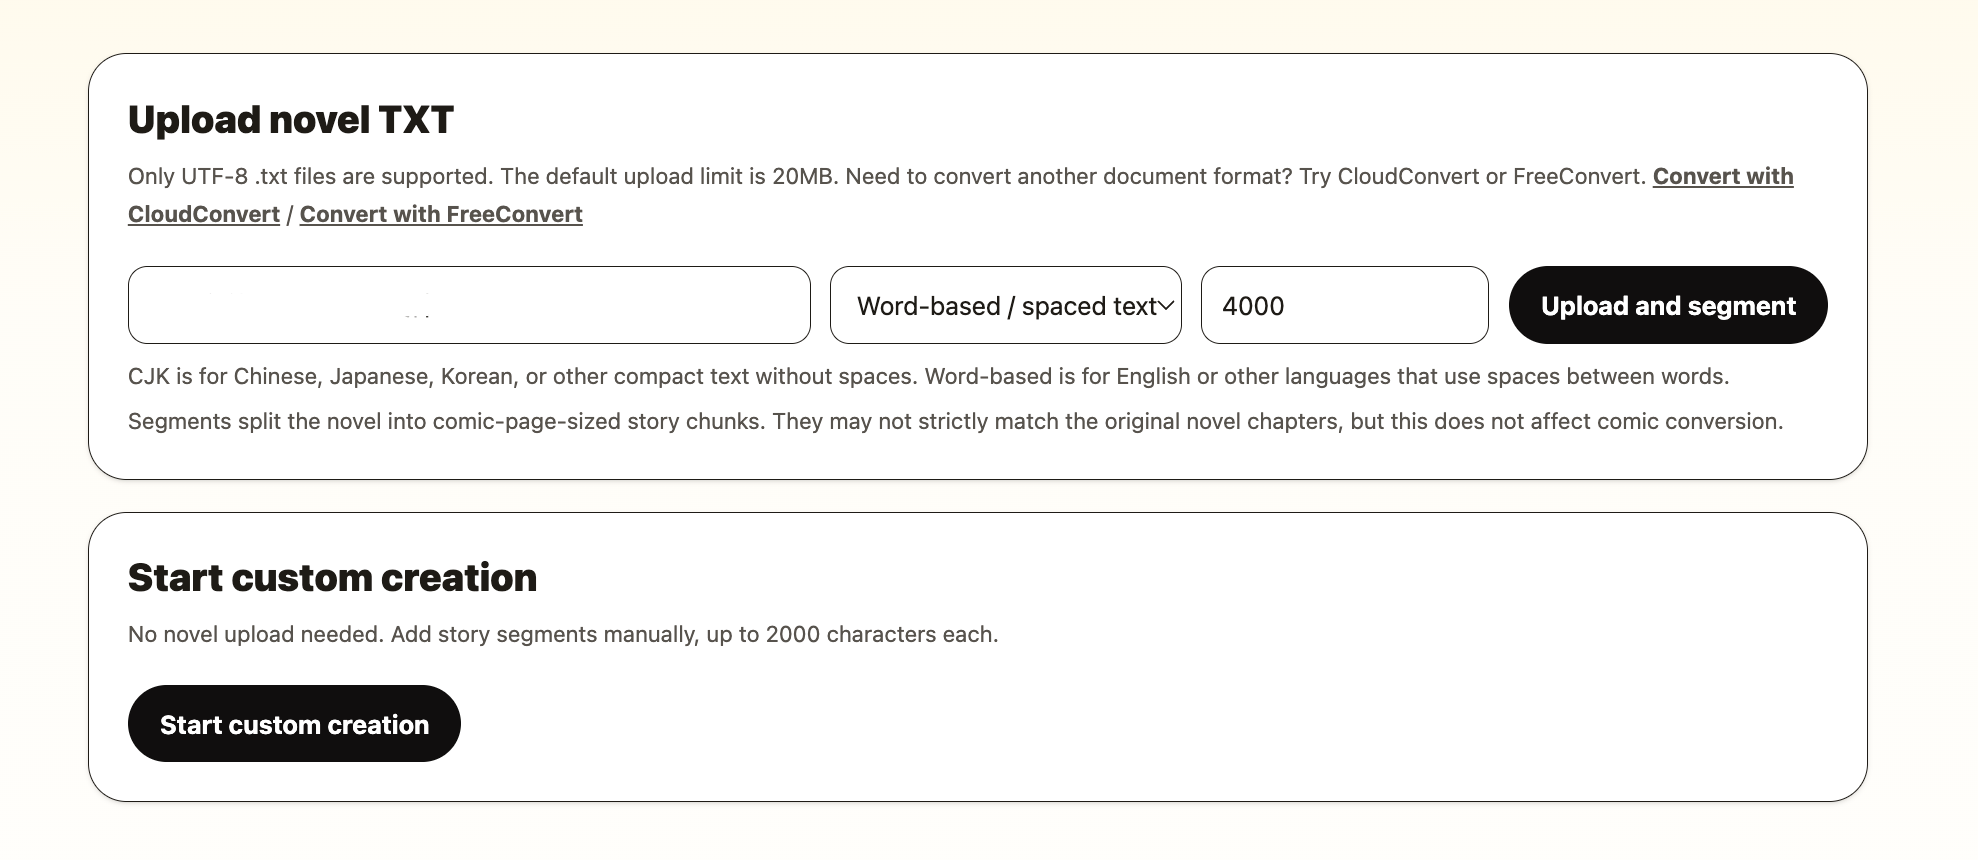
Step 1: Prepare your novel as a TXT file
The fastest way to start is to save your story chapters as a single plain TXT file encoded in UTF-8. If your writing platform uses a different format, you can convert it for free with tools like CloudConvert or FreeConvert before uploading.
If you are still writing and do not have a complete file ready, you can also add segments manually one at a time. The manual mode accepts up to 2000 characters per segment and is useful for testing chapter illustrations before committing to a full upload.
Step 2: Choose the right segment mode for your language
When you upload, you choose how the story gets split. CJK mode is for Chinese, Japanese, Korean, or any compact text without spaces between words. It splits at roughly 1000 characters per segment by default. Word-based mode is for English and other spaced languages — it uses about 4000 characters per segment.
For a webtoon style, smaller segments often work better because each image becomes more focused. You can set CJK segments as short as 1000 characters or word-based segments as short as 3500 characters.
CJK / compact text
1000–2000 characters per segment
Best for Chinese, Japanese, Korean webnovels. Short focused scenes, clear action panels.
Word-based / spaced text
3500–5000 characters per segment
Best for English webfiction and novels. Captures full scene beats with dialogue and description.
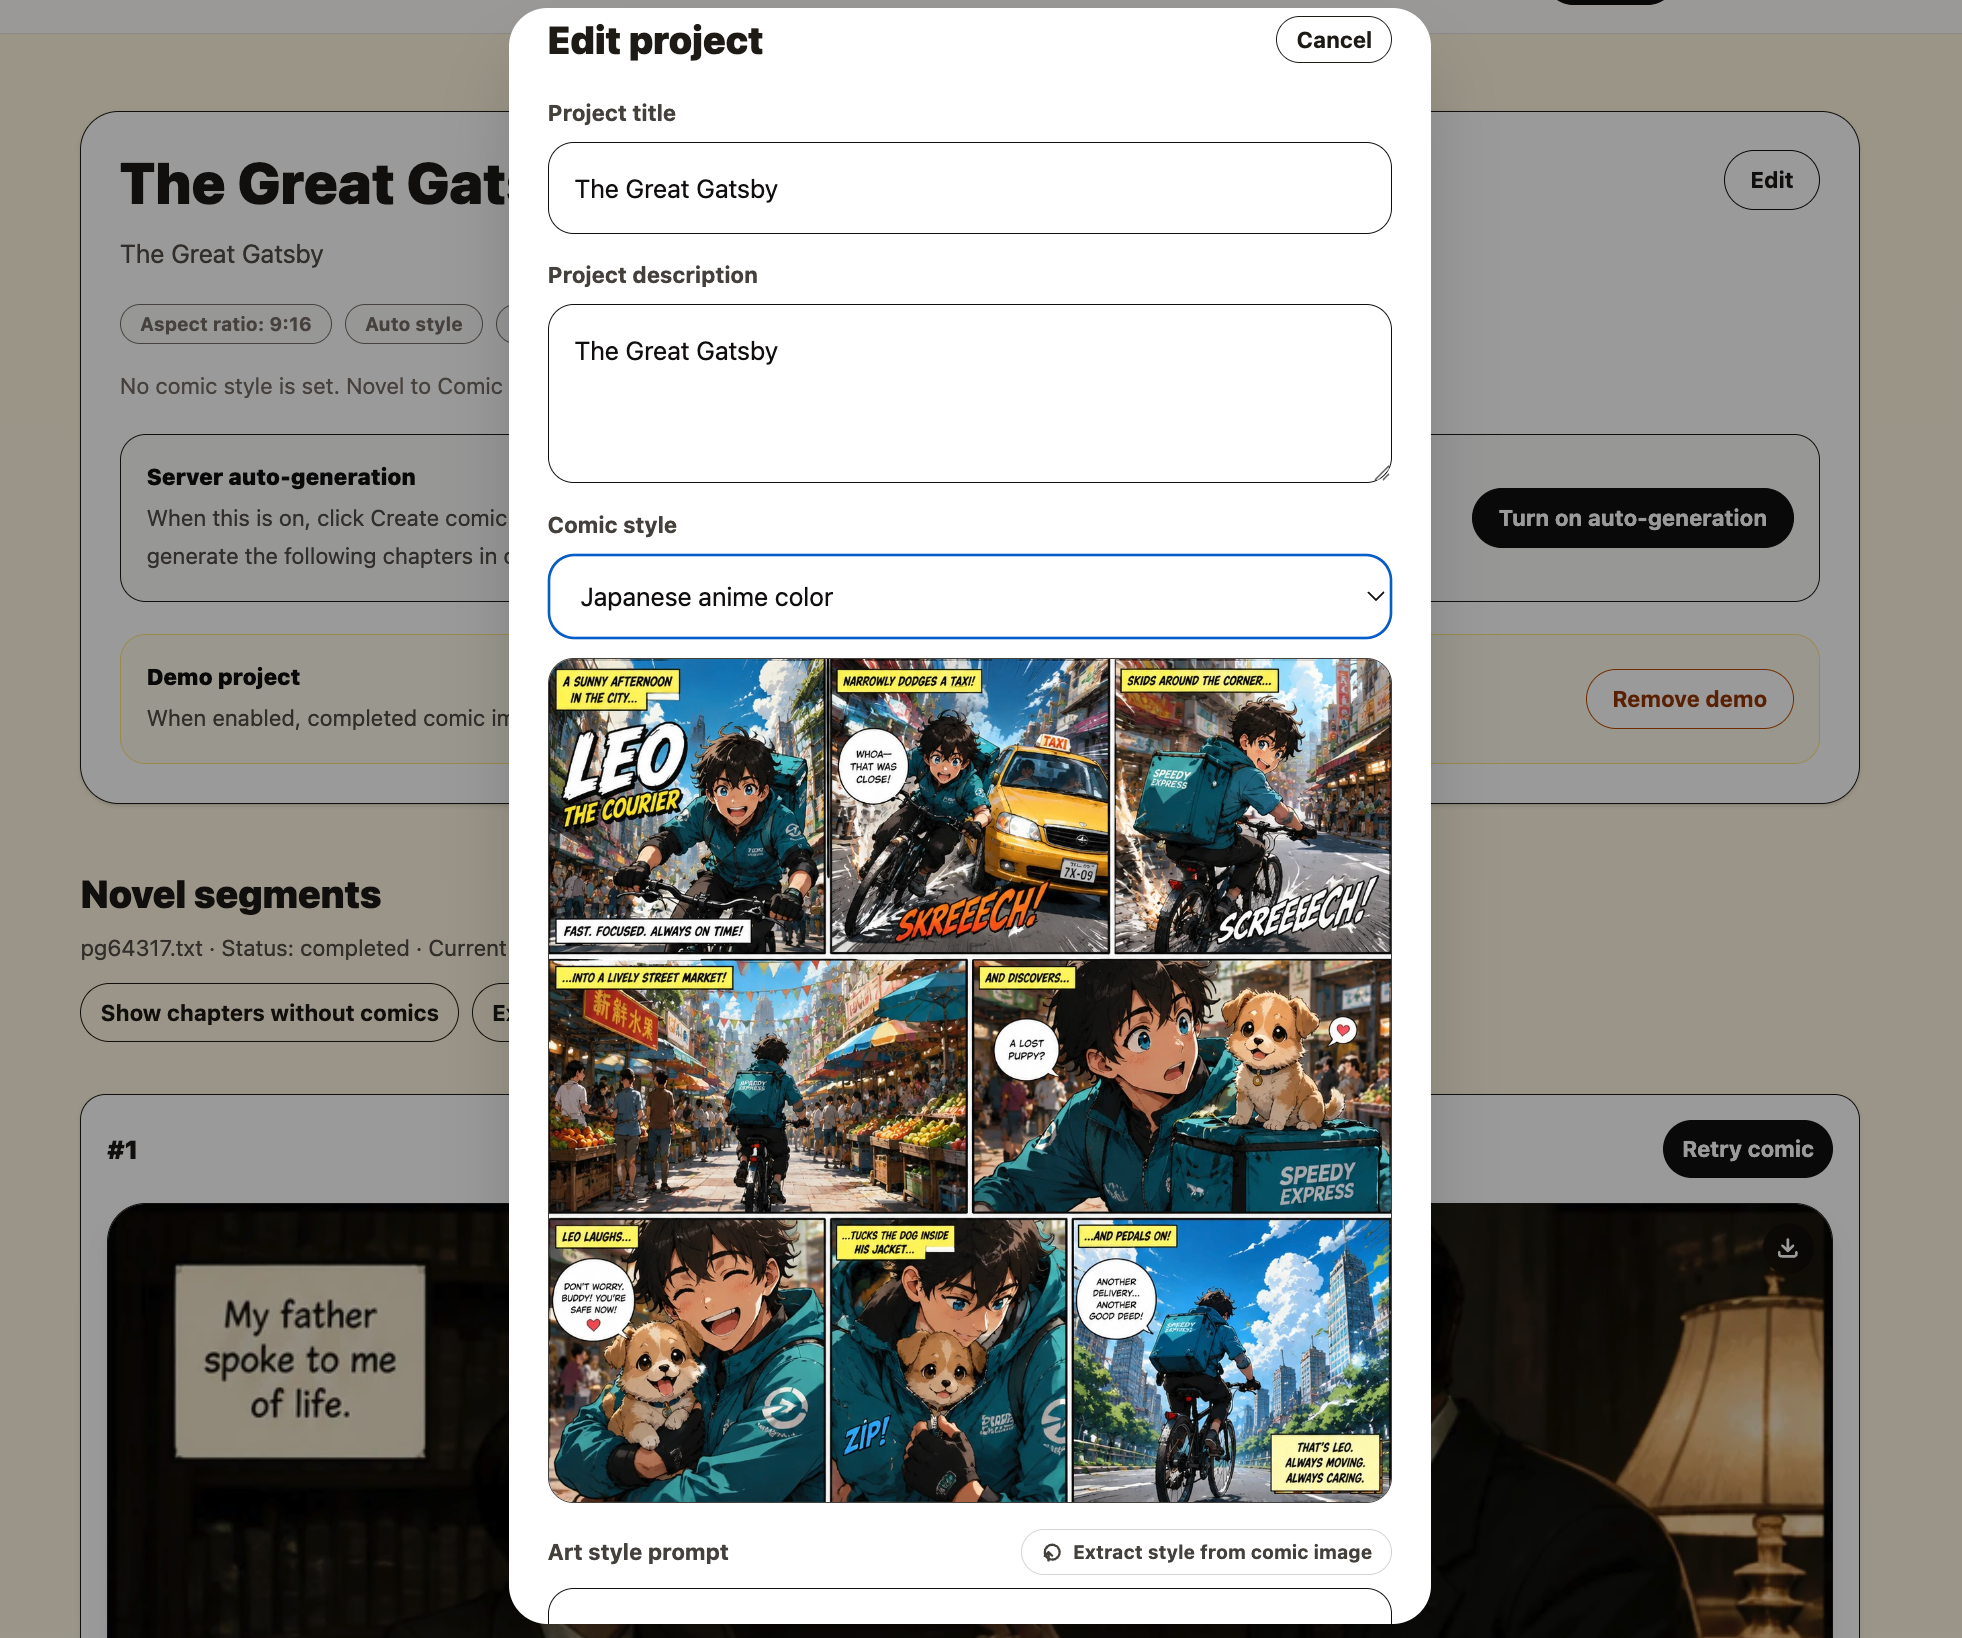
Step 3: Set a webtoon style for the whole project
Style is set once per project in the project settings. You can choose the built-in Webtoon color preset for a bright, vertical-panel look that matches the format Korean and Chinese web comics are known for. Or you can write your own style description to target something more specific — such as a particular color palette, line weight, or mood.
If you already have a favorite webtoon or comic page, you can upload a reference image and use the AI style extraction feature to turn it into a reusable style description. This costs 5 credits and takes a few seconds.
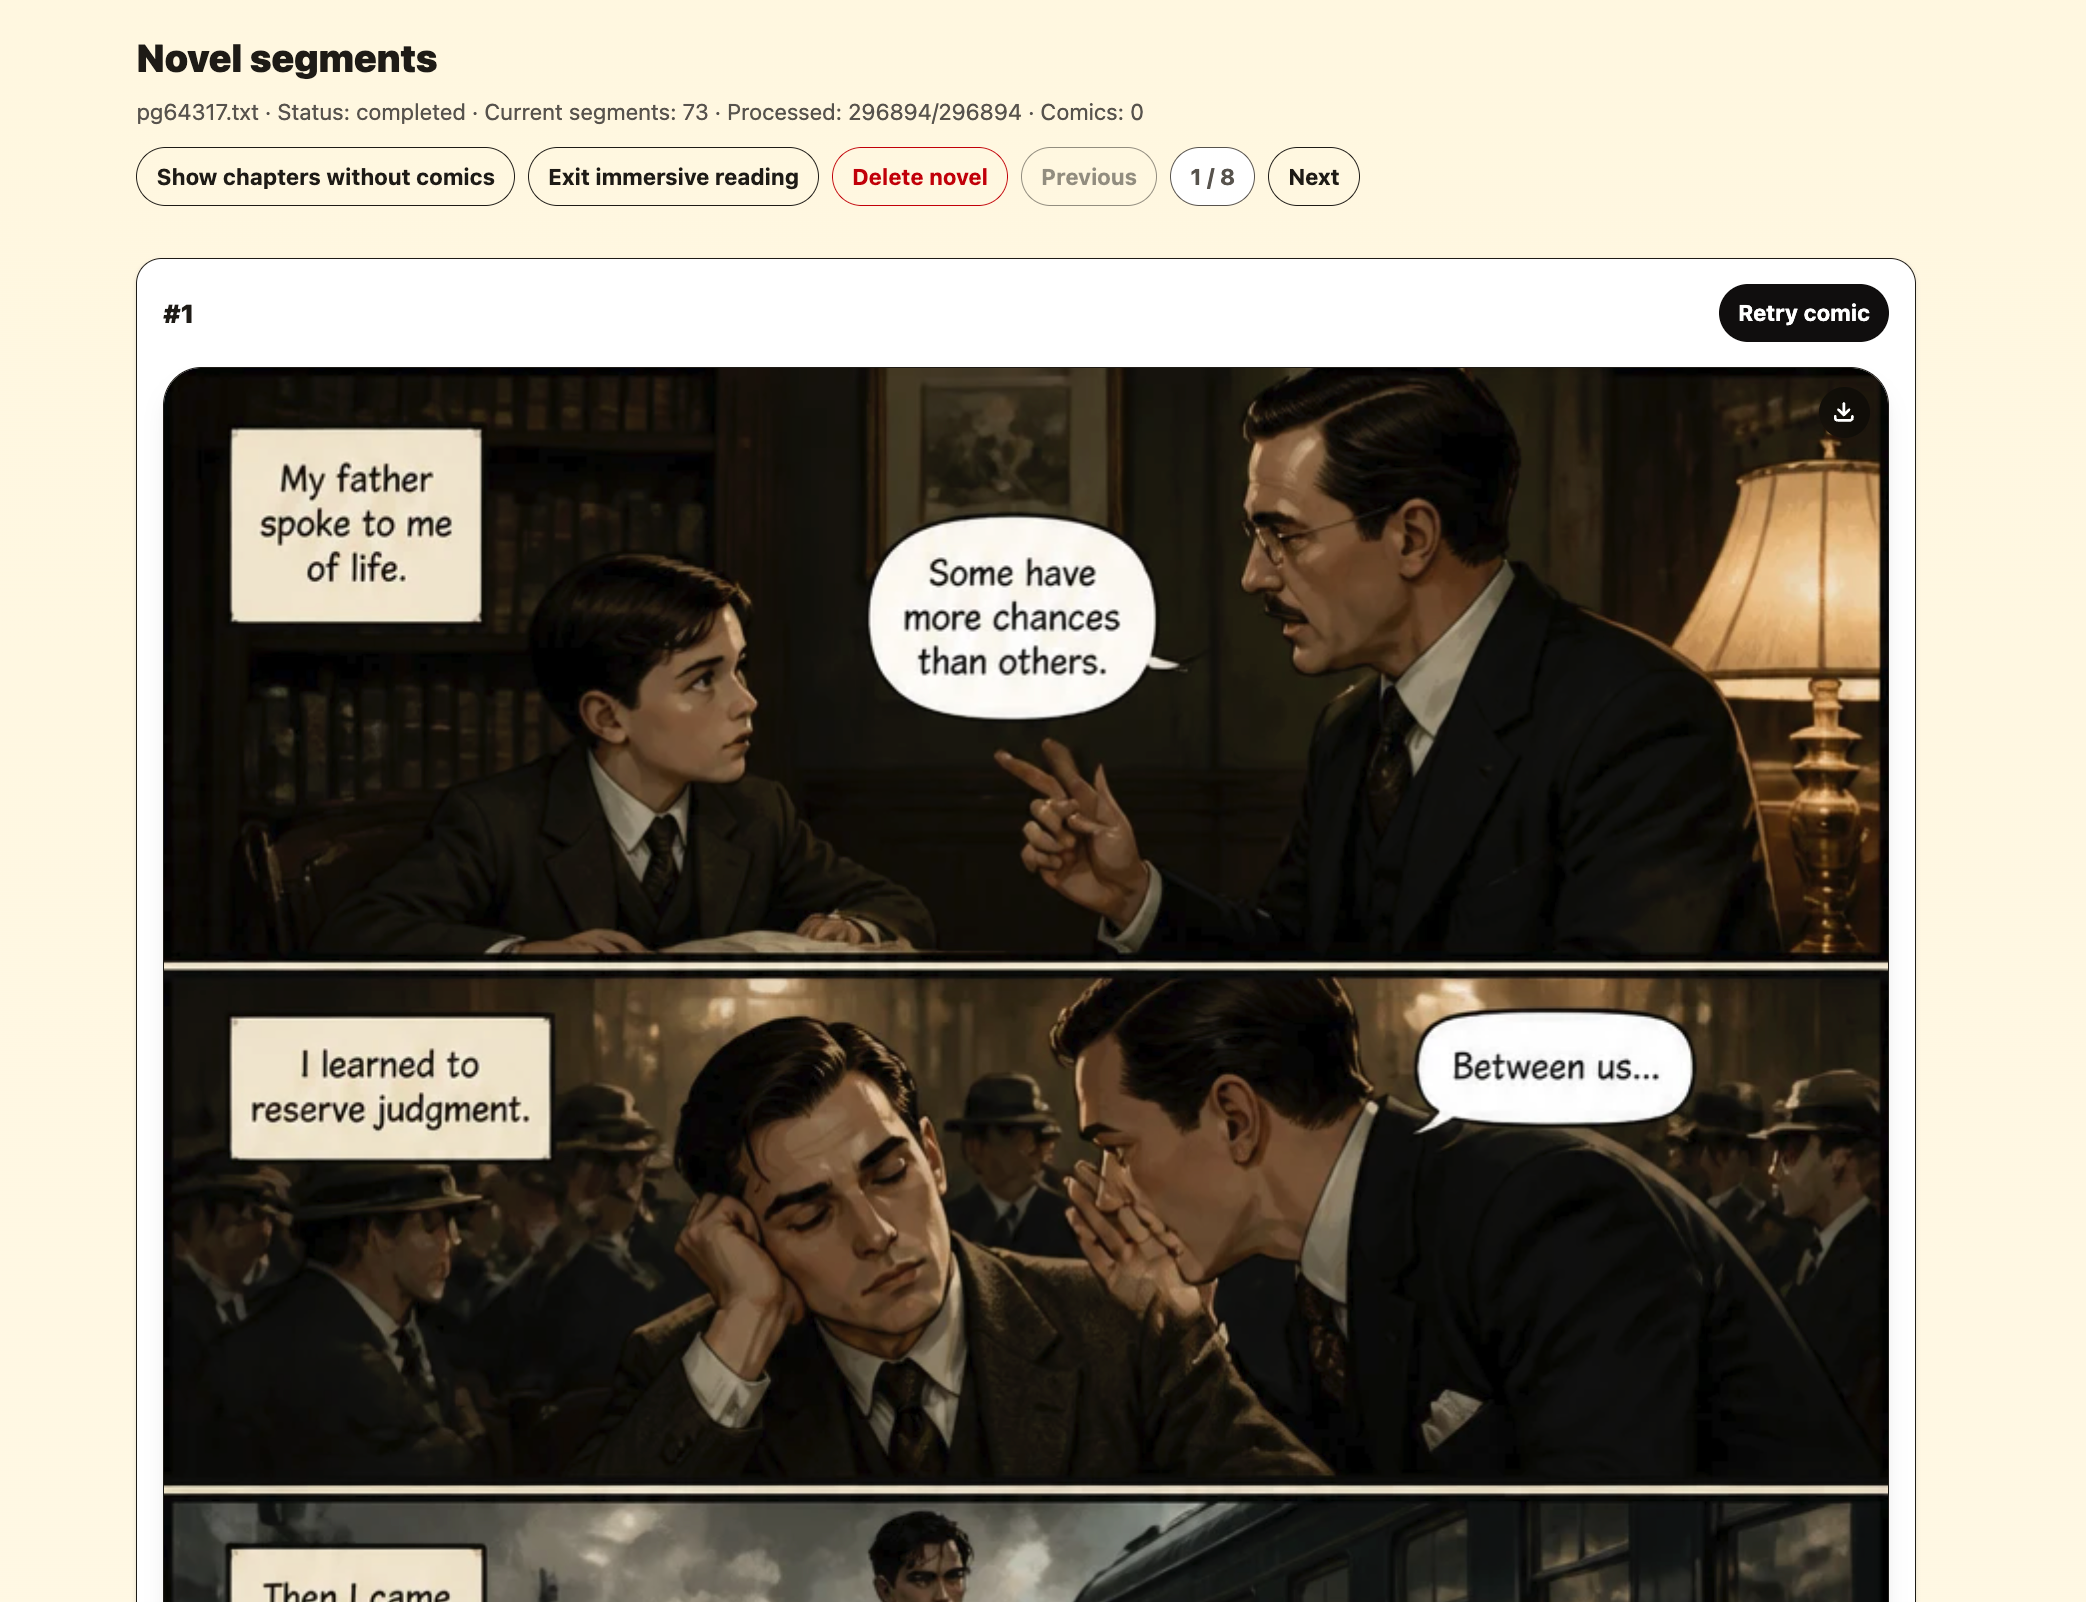
Step 4: Generate the first chapter illustration
Pick the first segment in your list and click Create comic. The system will read that segment's scene, simplify the story plot for visual adaptation, and submit it to the image generation pipeline. You can watch the progress on the page. Most images complete in under a minute.
Look at the first result. Does it look like your story world? Does it show the right character? If something is off, you can edit the segment text to add clearer visual details, then retry.
Step 5: Turn on auto-generation for the full run
Once you are happy with the style and the first few results, you can turn on server auto-generation. With this on, after each comic finishes the server automatically starts the next segment in order. You do not need to stay on the page or click through each chapter.
You can turn auto-generation off at any time. It will not cancel a page that is currently generating, but it will stop the queue after that page finishes. This gives you control over how far to run the generation before reviewing the results.
How to use the images once they are ready
Download the images you like. You can attach them to chapter posts, share individual panels on social media, compile a short preview of your story, or build a visual preview page for readers who are deciding whether to follow your series.
Make sure you hold the rights to the original story. AI-generated images derived from your own original writing are generally yours to use, but the rules around original versus derivative work and platform policies vary. Check the terms of any platform you publish to.
Add visuals to your next chapter
Your story is already written. The scenes are already there. Start with one chapter, generate one image, and see if it fits the look and feel of your series. If it does, the rest follows naturally.
Start creating